Art Thief: Draw a hand
This is not the only position that a hand may rest at a person's side, but it's one of the most common. Give it a try, and then observe the other positions that we might see a relaxed hand.
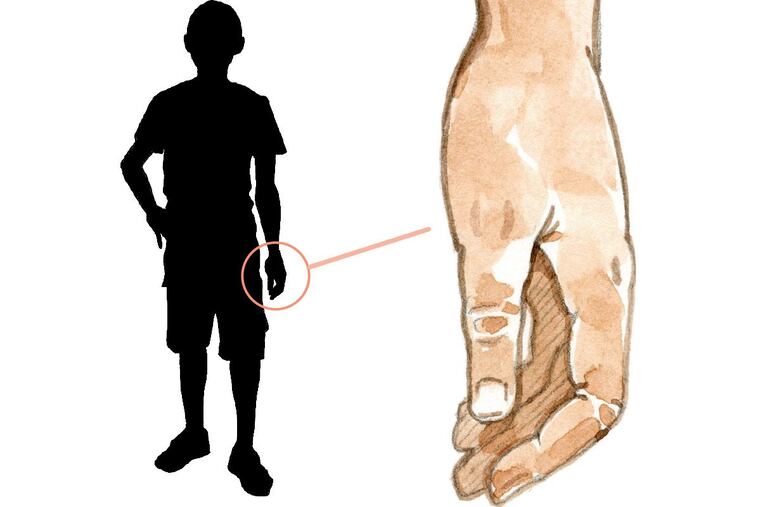
2. The wrist will dip in slightly more on the inside as shown above. Extend the lines of the wrist upward to make part of the forearm. Next draw the top portion of the index finger.
3. Finish the index finger with the shape shown above. Then sketch in the fingers that are behind the index finger. You may notice that the fingers have been simplified. We don’t need a lot of detail.
4. Erase the unneeded lines. Draw the creases on the joints as shown. People’s palms are not darker than the tops of their hands, but I have shaded the inside of the hand because it
is in shadow.
5. Choose any flesh tone for the hand and add color.
Email:
art@phillynews.com
Or send to:
Amy Raudenbush
Philadelphia Daily News
801 Market St.
Philadelphia, PA 19107
Next week:
Draw a flamingo
Shoutouts to: Sarah Freeman, Samiyah Jones.
