Quarantine baking projects for home cooks without yeast (or patience)
Lemon meringue bars, no-yeast cinnamon buns, and homemade Oreo cookies.

I am not a baker. I’m contractually obligated to bake once a year: I make a from-scratch chocolate-chocolate birthday cake for my husband, who in turn makes me whatever high-maintenance cake I choose.
I don’t really have the patience for baking without a box mix (which, I’ll admit, I’m too much of a food snob to use). Though it’s easy enough, I don’t relish weighing out ingredients by the gram. I begrudge the fact that you should measure thickness and dimension for best results. I despise scraping down the paddle attachment of a stand mixer. And worst of all — the thing I brace myself for when I do bake — is this: the likelihood of failure when undertaking an ambitious recipe, the possibility that hours of time and expensive ingredients might just end up in the trash, as did that chocolate tart with hazelnut brittle and orange zest from Yotam Ottolenghi’s Sweet.
But as this pandemic wears on and my ennui grows, I envy those throwing themselves into new hobbies — namely, baking. You’ve seen the pictures of beautifully scored sourdough loaves and meticulously decorated focaccia on Instagram and Facebook. It’s enough to make you want to hunt down some starter.
» READ MORE: Finding sourdough magic at home with help from Lost Bread’s Alex Bois | Craig LaBan
So I decided to take on a baking project or two, with a couple important constraints. There would be no yeast, and the recipes would be creatively challenging but technically doable. One thing I’ve learned from the baking projects of my past: Know your limits, or you’ll wind up sponging batter off the backsplash.
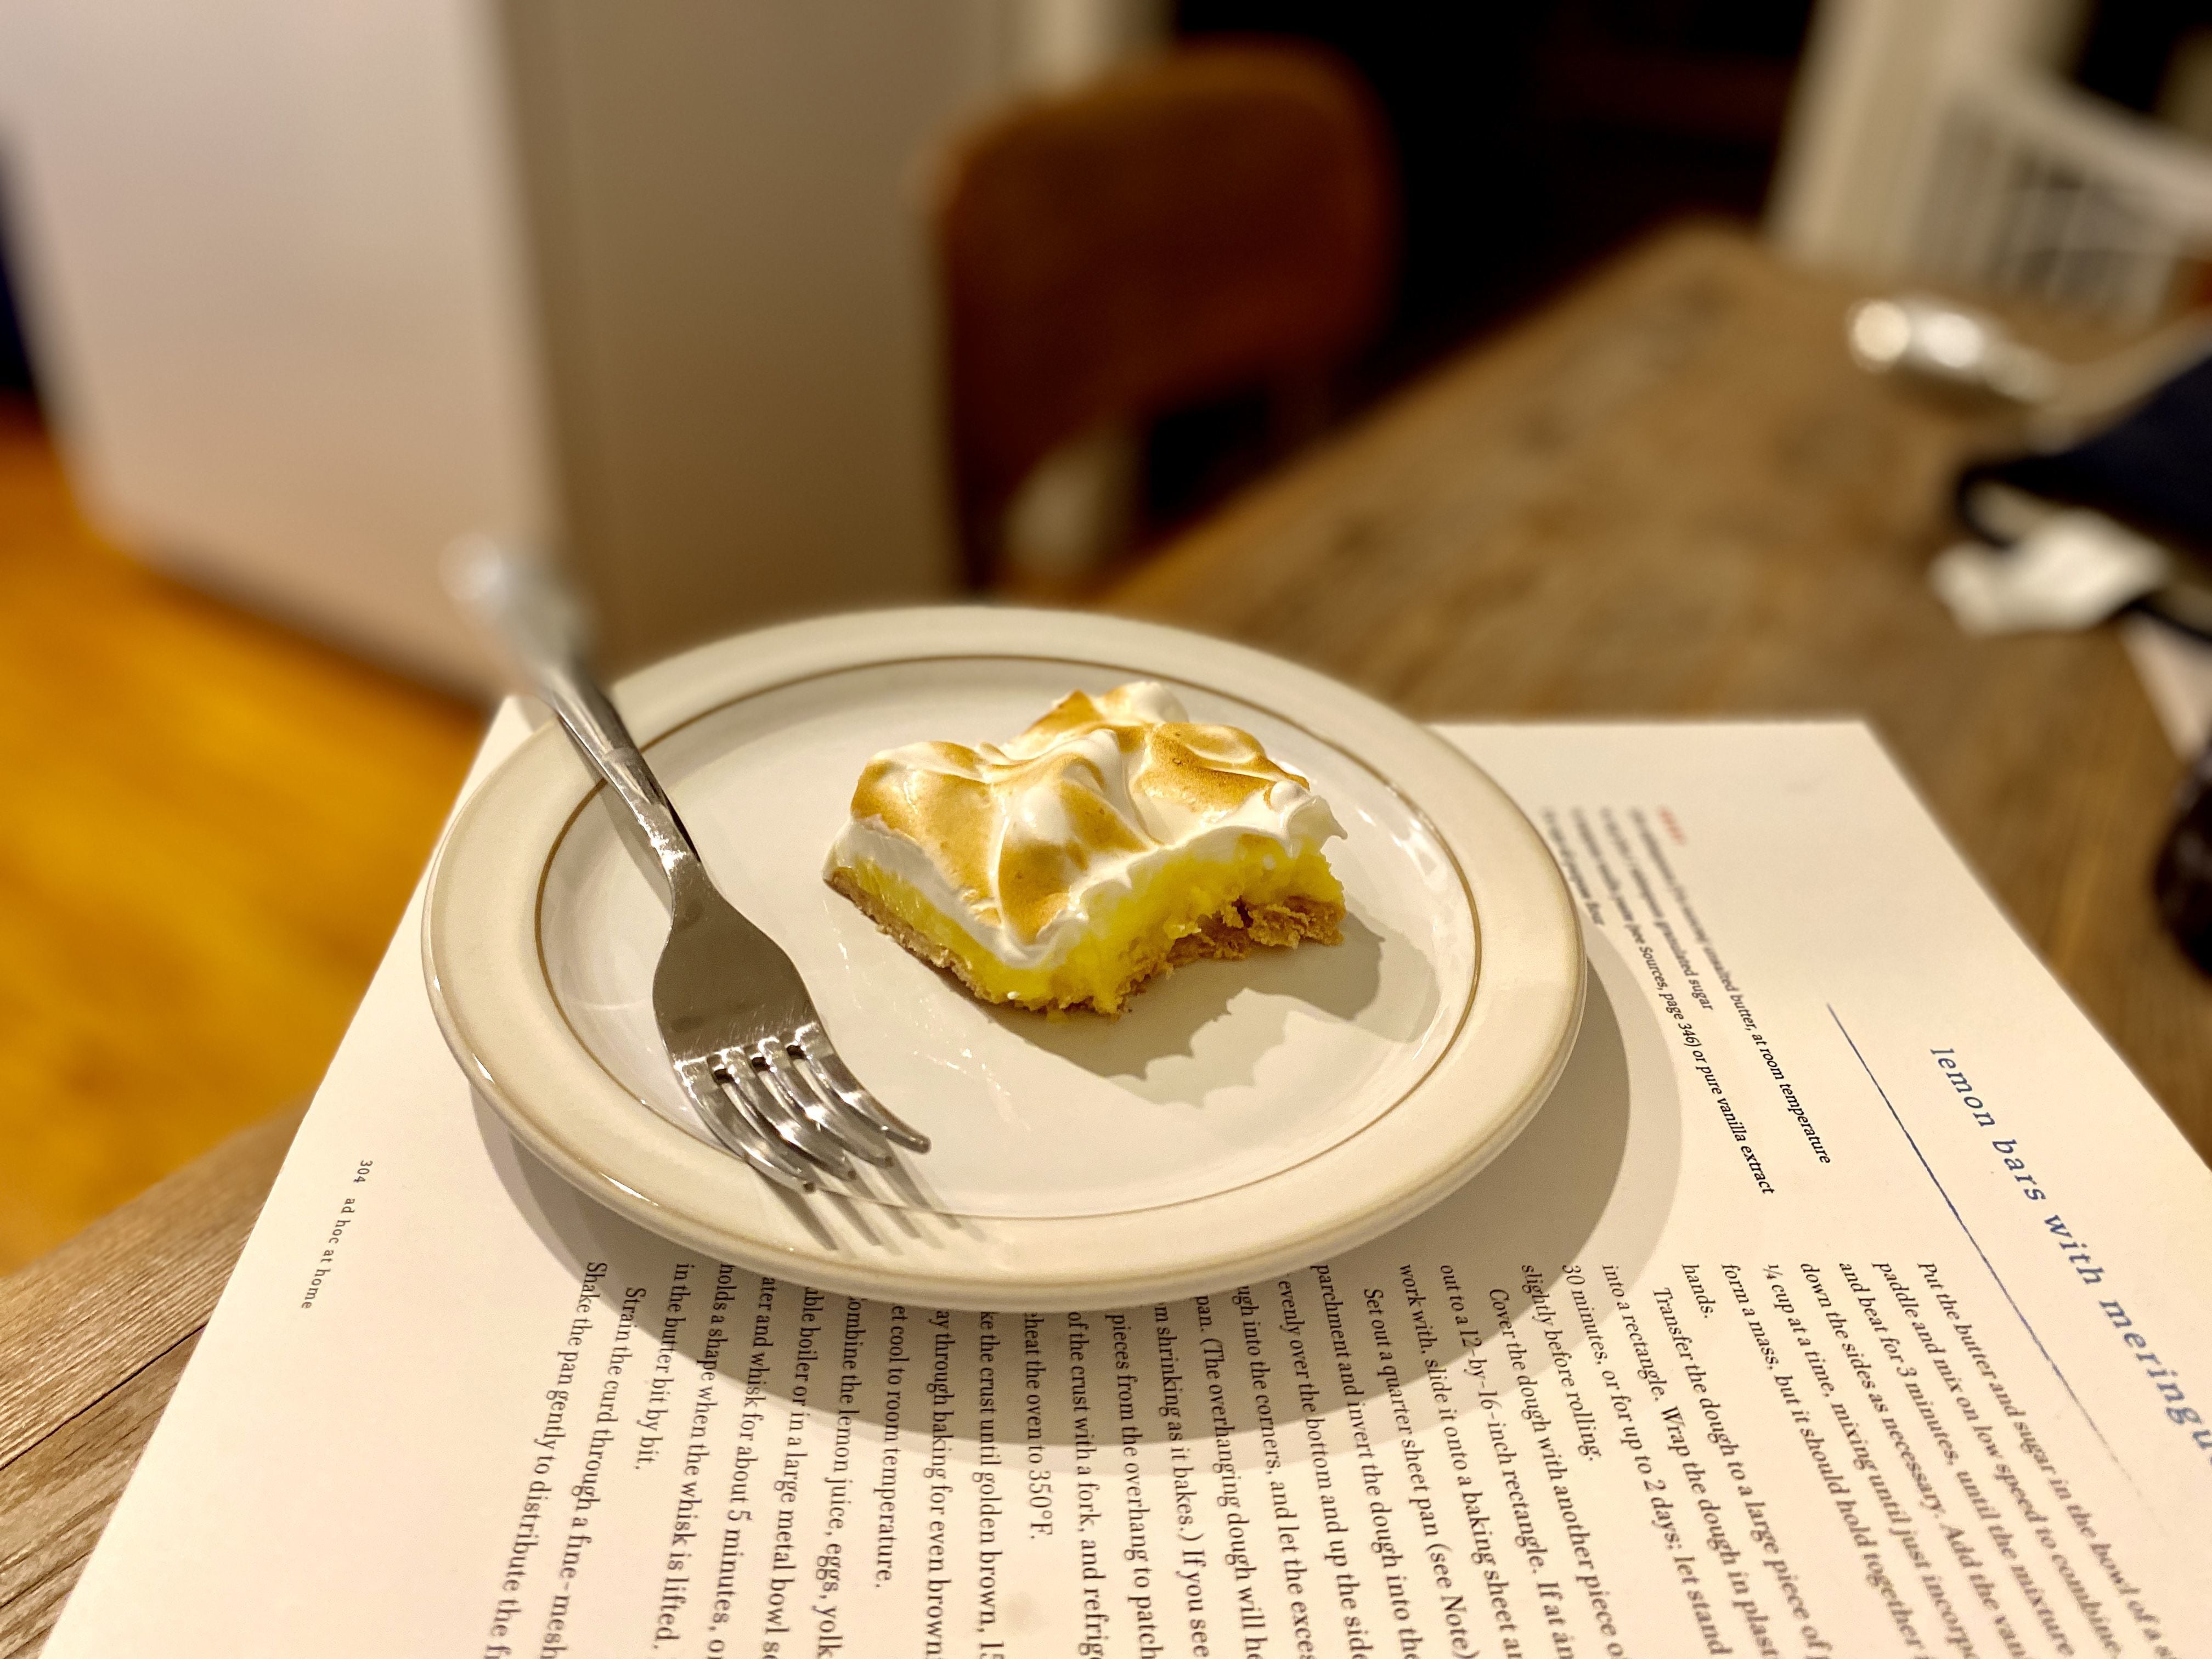
Project 1: Lemon Meringue Bars
I let my husband, the resident project baker in our house, select this recipe from Thomas Keller’s Ad Hoc at Home (Artisan Books). Given that neither of us really care for meringue, I suspect he picked it because it calls for blowtorching the whipped egg-white topping.
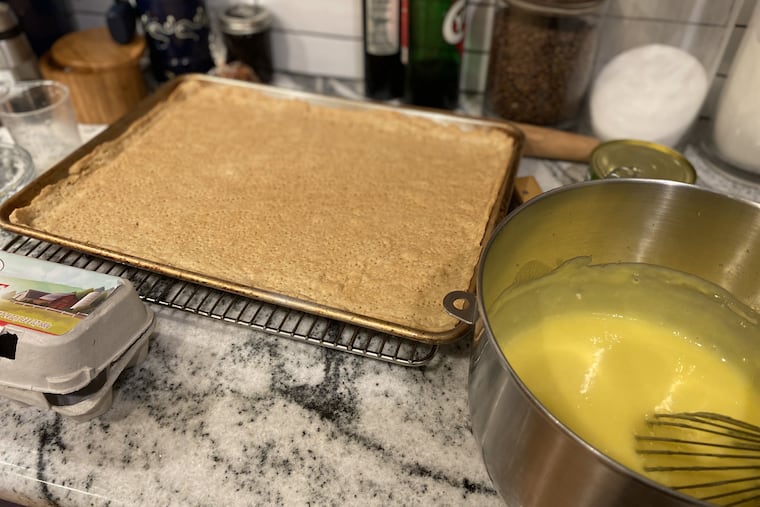
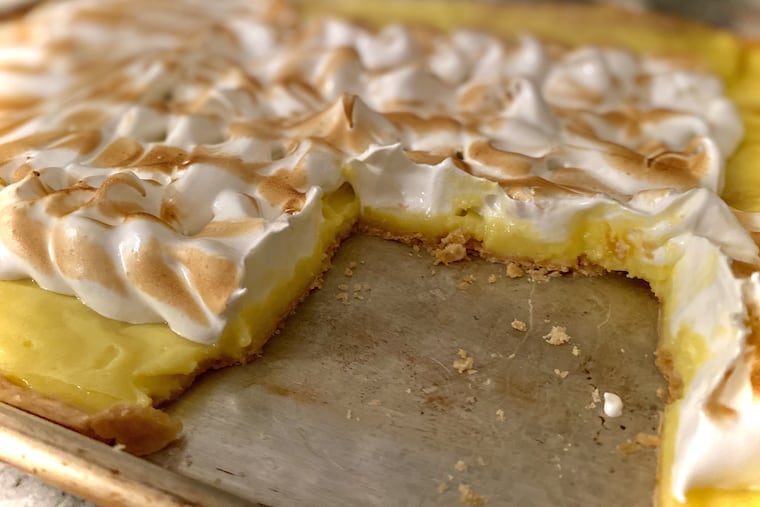
Though it didn’t seem terribly challenging — the crust is made from four ingredients, the filling from five — this recipe had its pitfalls, the biggest of which was its call for “quarter sheet pans, which measure 9 by 13 by 1 inch.” “A standard [9-by-13-inch] baking dish would be too deep,” a note at the end of the recipe said.
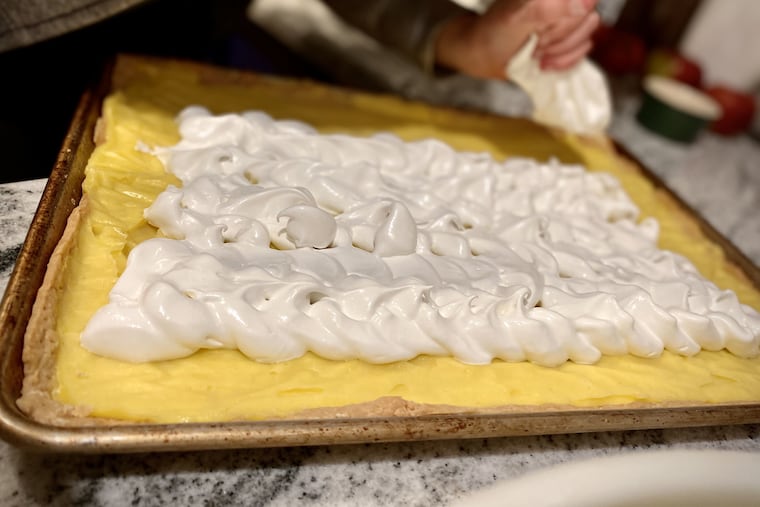
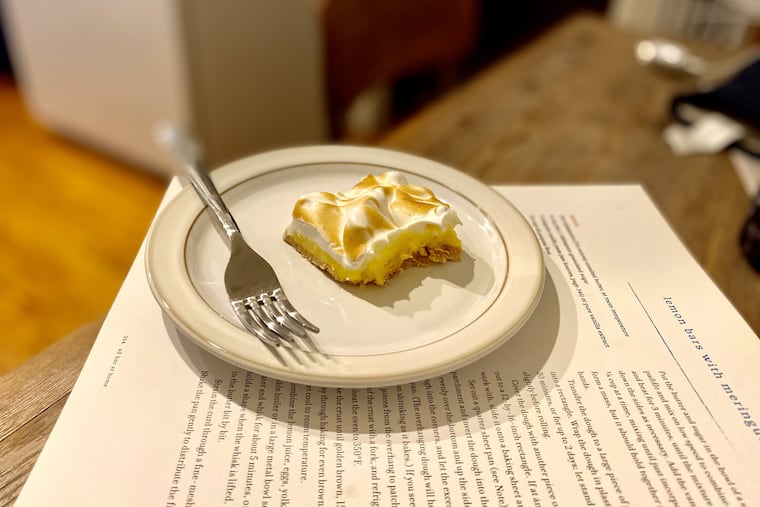
I, like most cooks, own standard 18-by-13-inch baking sheets (professionally known as half-sheet pans), but was too dimensionally careless to figure this out ahead of time. Which, in retrospect, explains why Keller’s otherwise easy-to-follow recipe didn’t seem to yield nearly enough pastry dough, lemon filling, or meringue. The result was incredibly thin but perfectly tasty lemon-slicked wafers. Patches of the bars have gobs of meringue imprecisely piped on top. Other parts are fluorescent yellow and unobscured by the sticky, almost marshmallow-y topping. Those were the parts we ate first.
These are especially delicious served frozen — and yes, blowtorching meringue is just as fun as you think it is. (You can get a culinary torch from Fante’s Kitchen Shop in the Italian Market, Kitchen Kapers at various area locations, and Restaurant Equippers in Pennsauken; don’t forget fuel.)
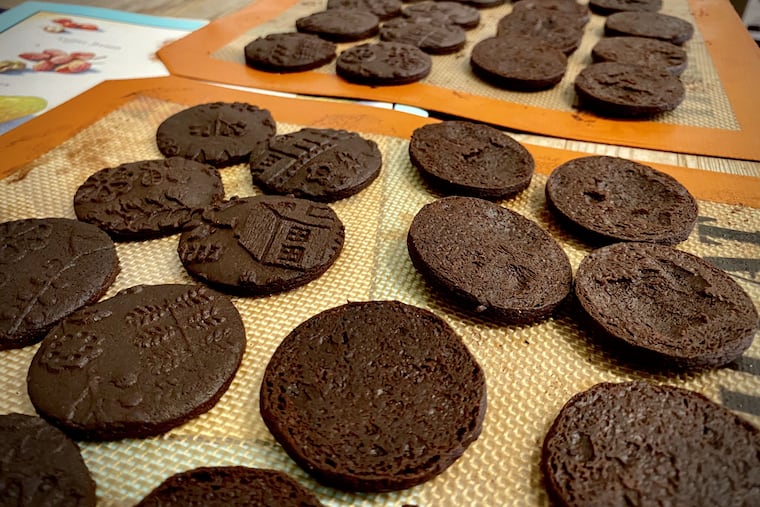
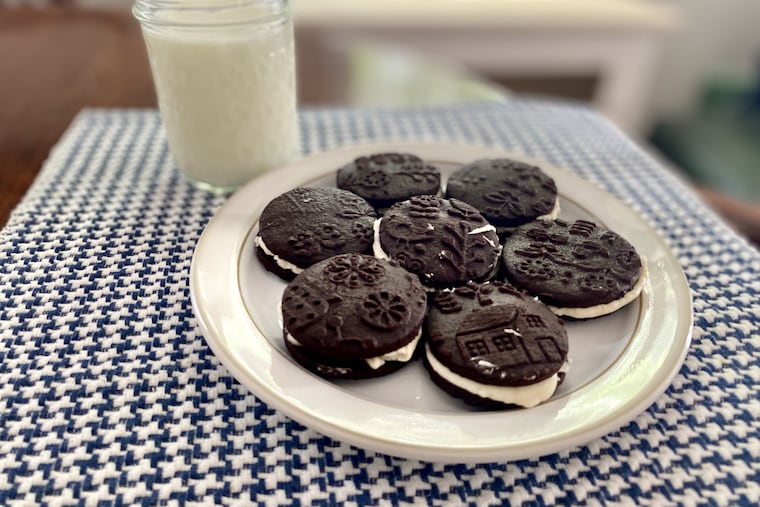
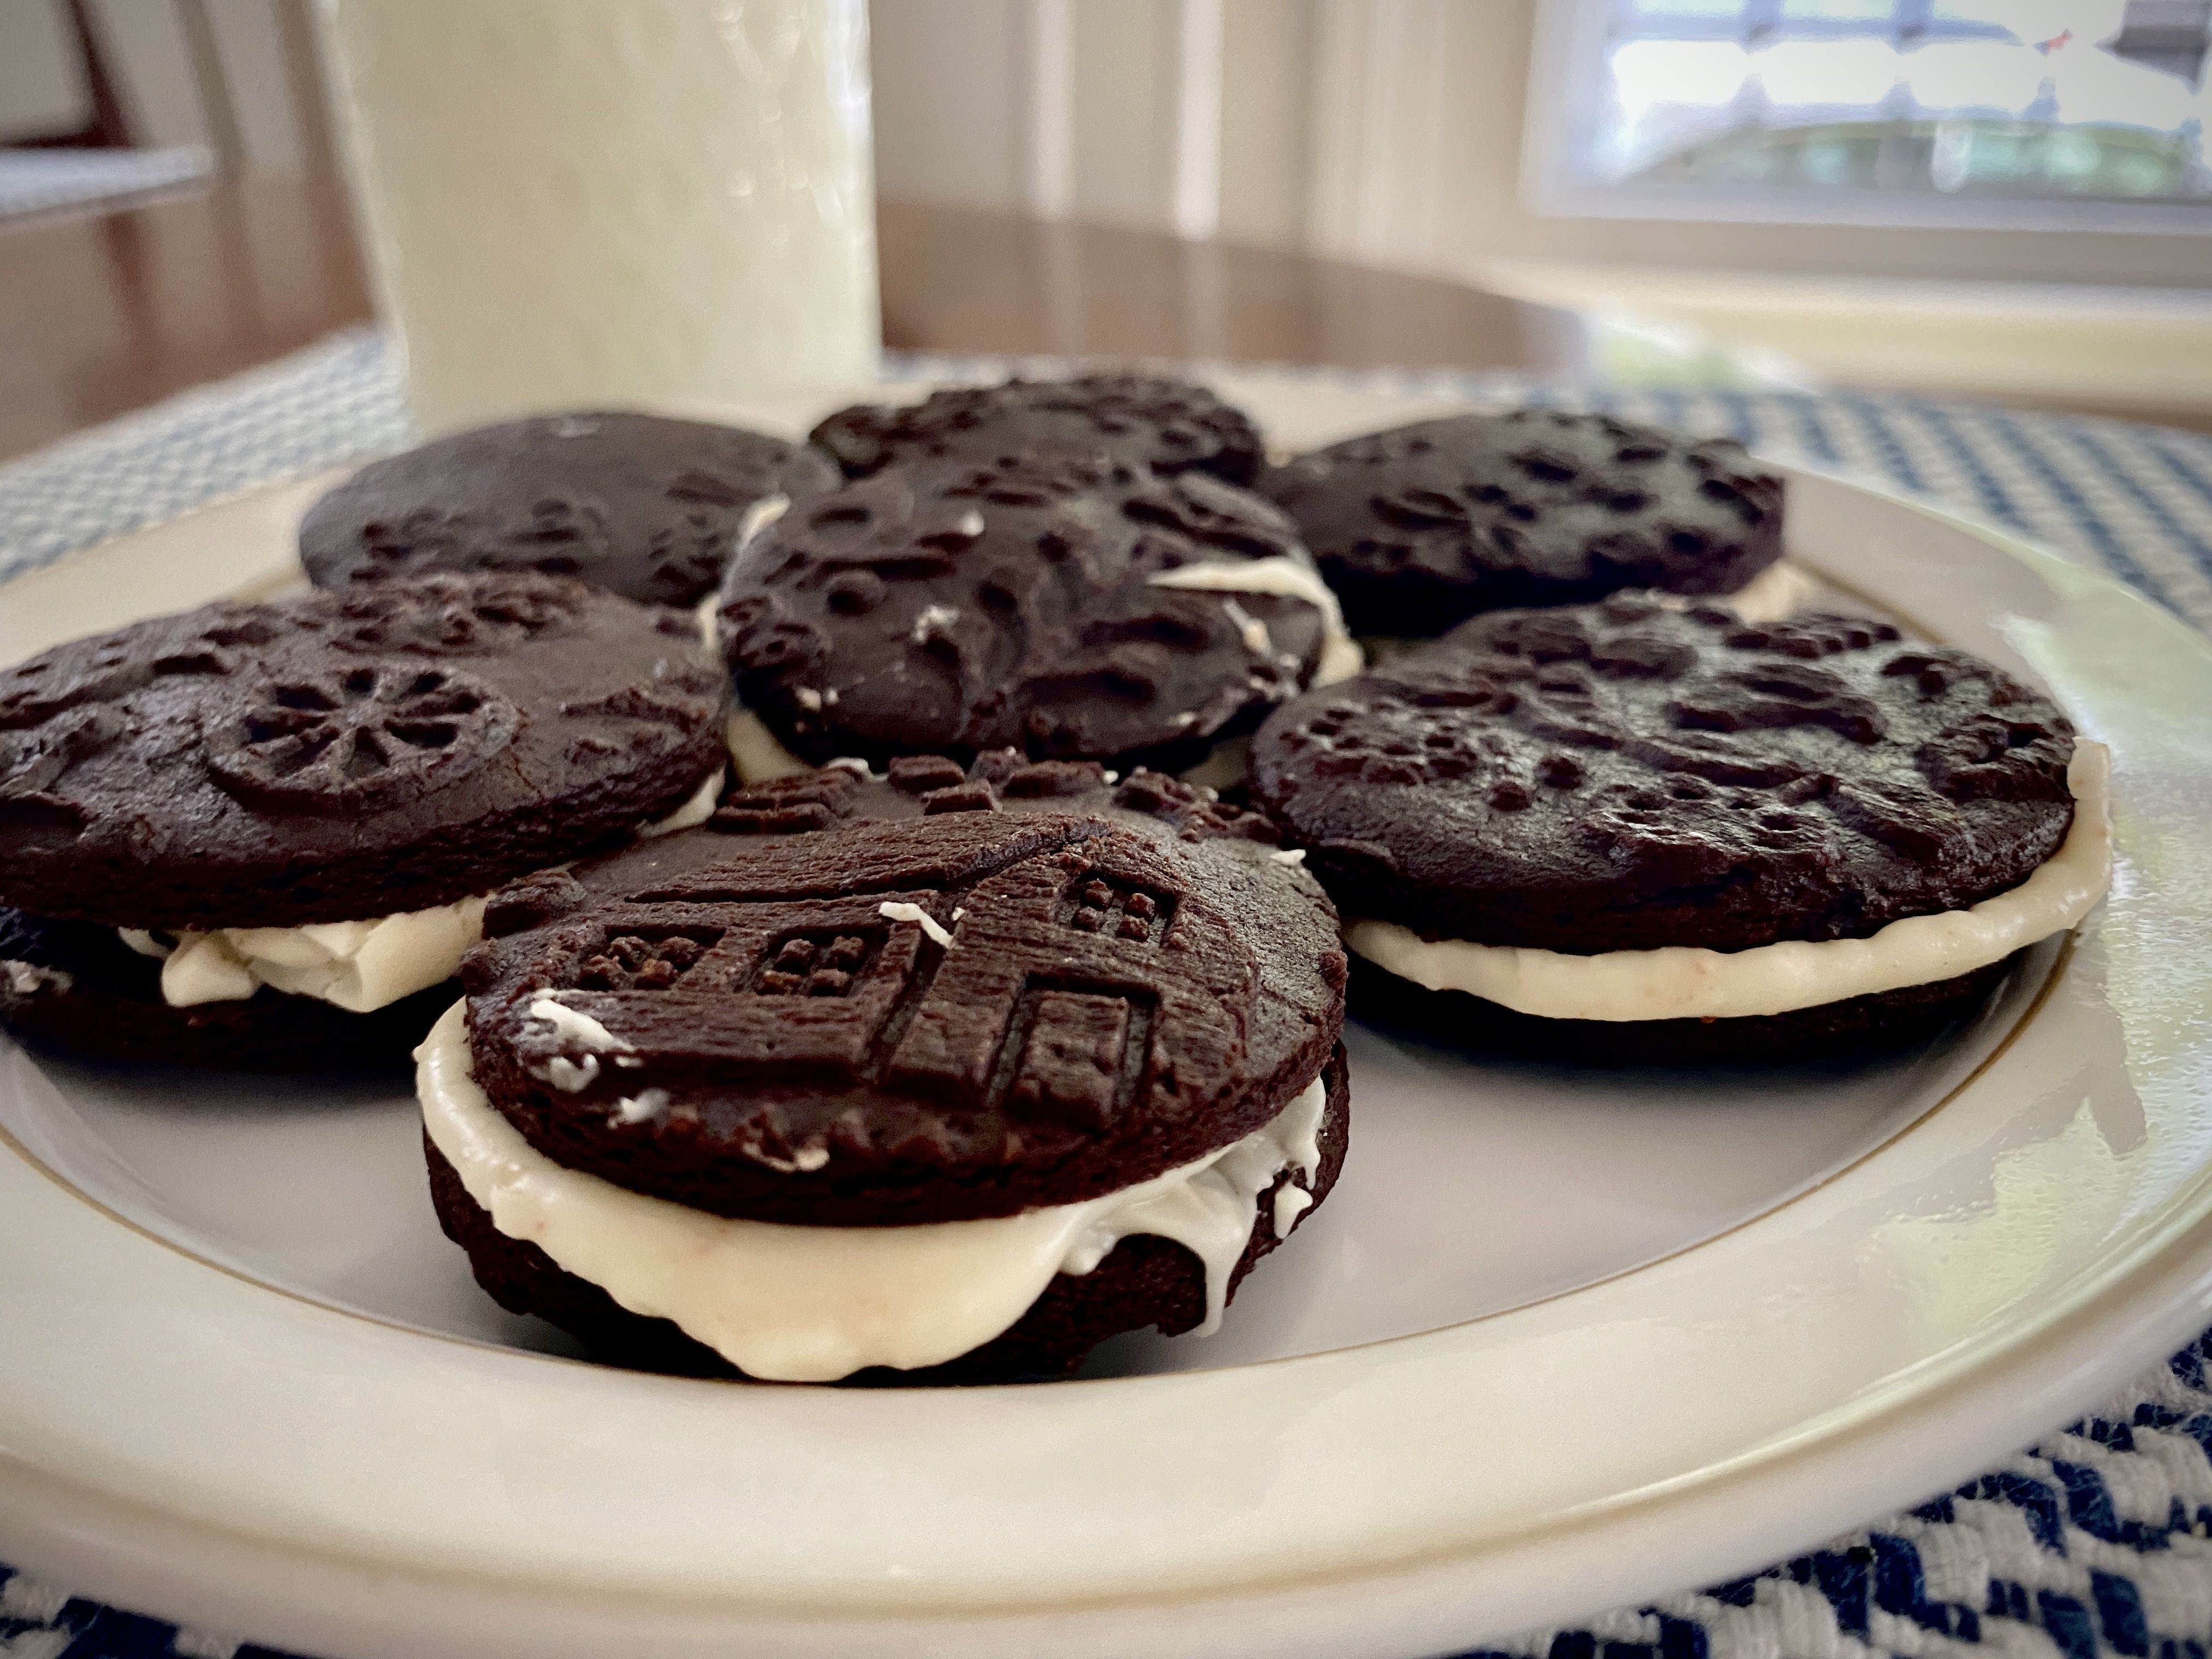
Project 2: Homemade Oreos
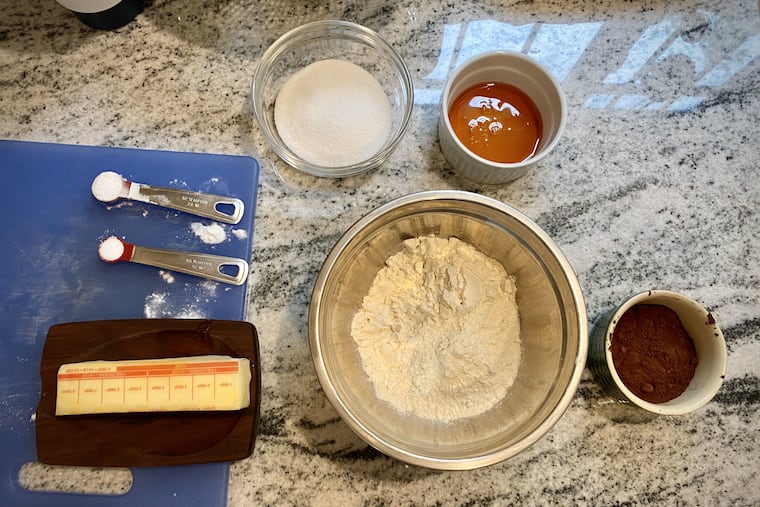
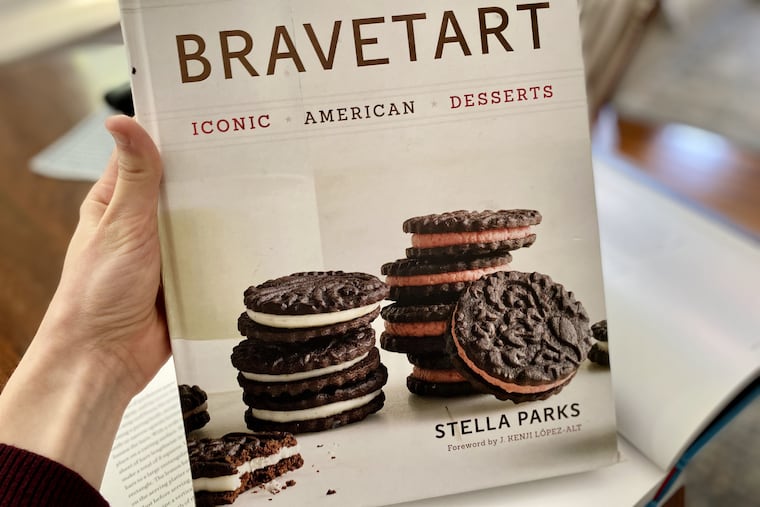
I picked this recipe from Stella Parks’ BraveTart (Norton), which is almost as entertaining to read as it is to bake from. Parks, best known from the food website Serious Eats, spent five years assembling this collection of recipes for iconic American candies, desserts, and snacks. There are recipes for homemade animal crackers, McDonald’s-style baked apple turnovers, Twinkies, and rainbow sprinkles. But the cover features Parks’ homemade Oreo cookies. (Or are they homemade Hydrox cookies?)
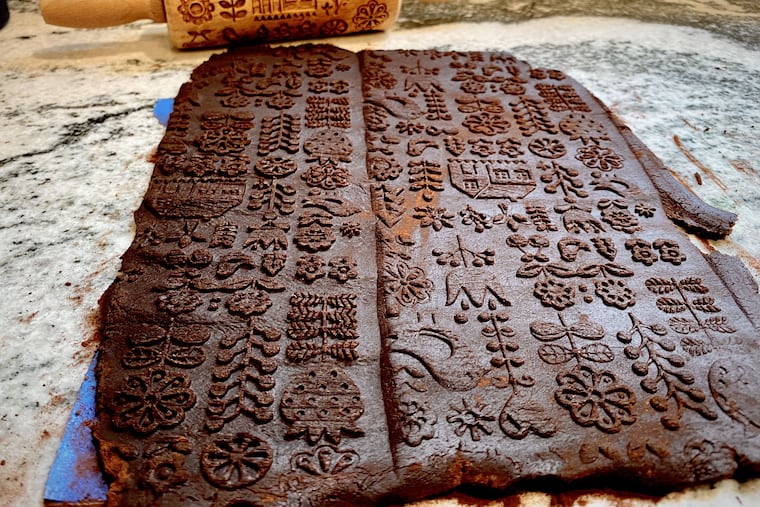
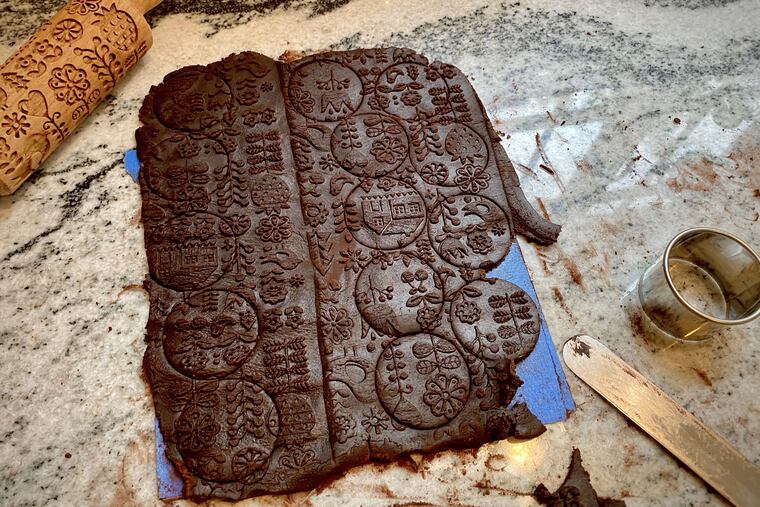
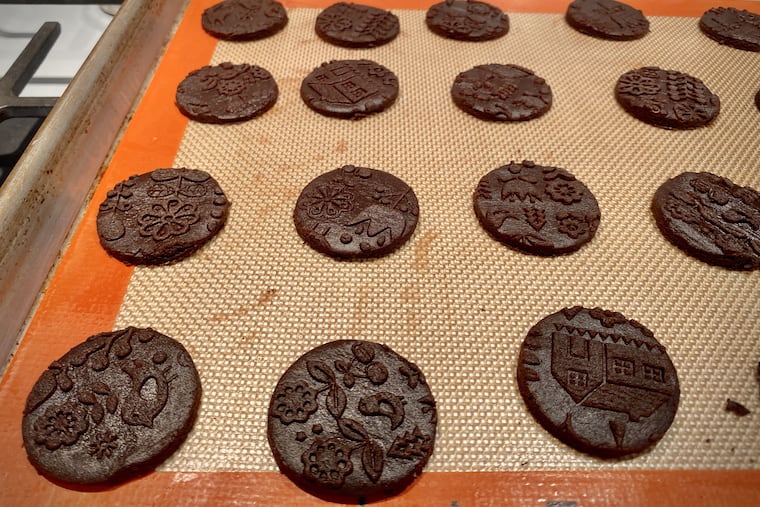
You need some specific tools and ingredients to make this recipe. First, you’ll want to get an embossed rolling pin, to make chocolate wafers that somewhat resemble an Oreo’s literally trademarked texture; these can be found in abundance on Amazon and Etsy, and at local kitchen shops closer to Christmas. You may also want a fluted 1½-inch-round cookie cutter, which adds to the effect. And if you want to use exactly what Parks calls for, order some Lyle’s golden syrup, coconut extract (wholly optional), and Cacao Barry Extra Brute Dutch-process cocoa powder.
Thankfully, we had most of these things, since my husband had attempted the recipe himself a couple years ago. But I did have to deploy him on a shopping mission to find the organic confectioners sugar, which is evidently tapioca-based and therefore less gritty than plain old powdered sugar. (“Isn’t this fun? It’s all part of the project,” I told him as I sent him to Sprouts market.)
» READ MORE: How to organize your fridge to maximize shelf life, time, money
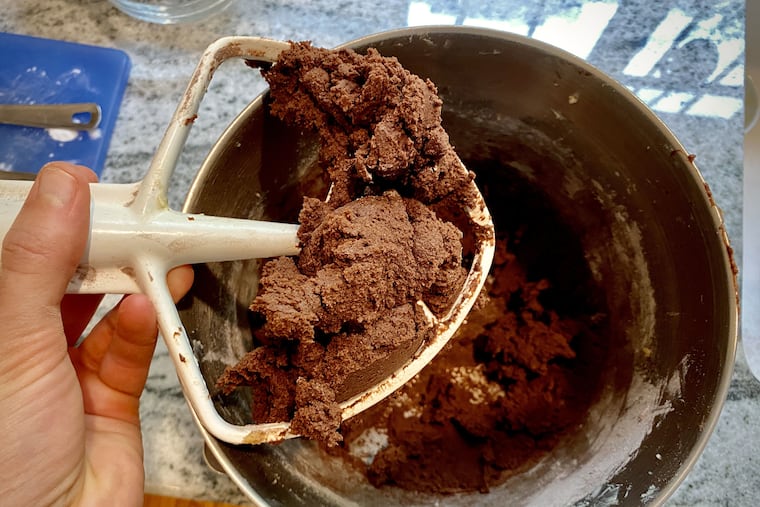
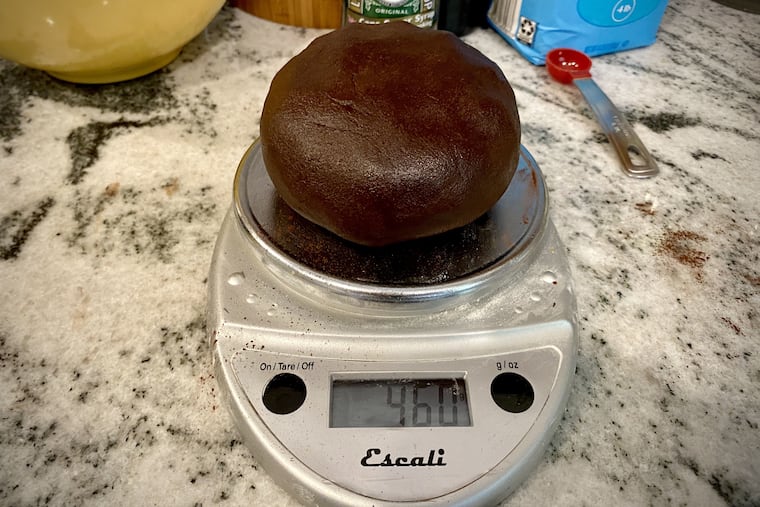
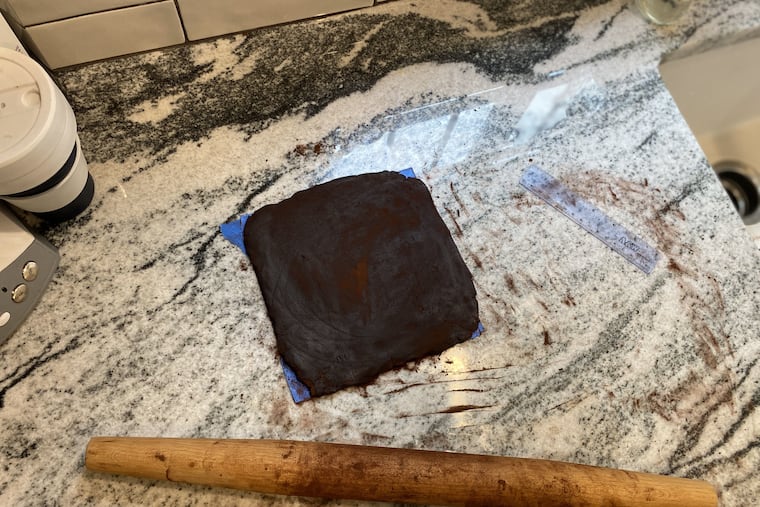
Thanks to the stand mixer, making the chocolate cookie dough is mercifully easy. Rolling out the dough — first with a regular rolling pin and then the embossed pin — presents a mild hurdle. As you roll, stamp, scrape up, then re-roll, it gets soft and crumbly and starts to stick (you might want some toothpicks to clean out crevices in the embossed pin). An offset spatula, extremely thin and ultra-flexible, is also a tremendous help in getting dough off the work surface.
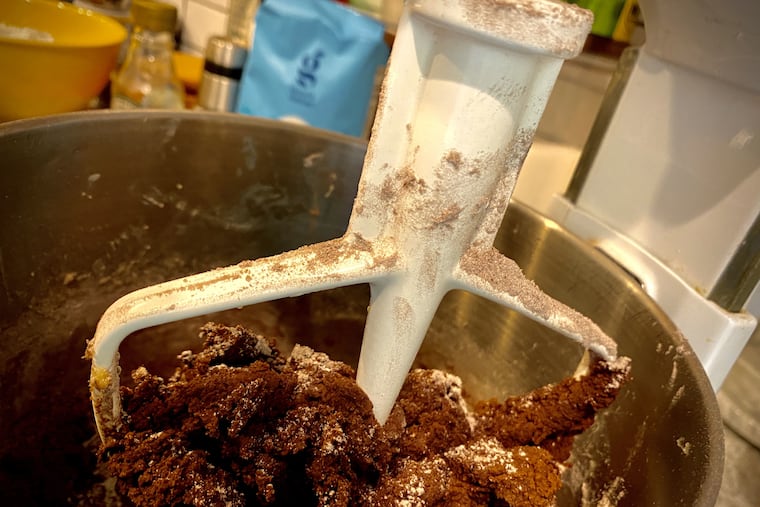
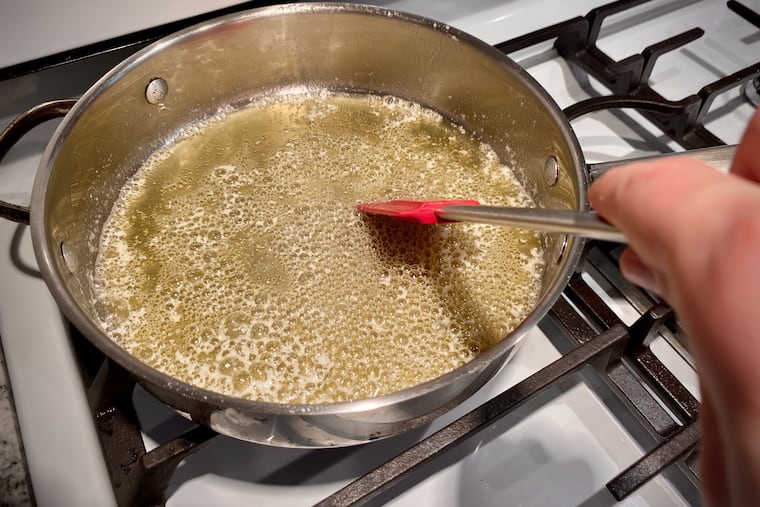
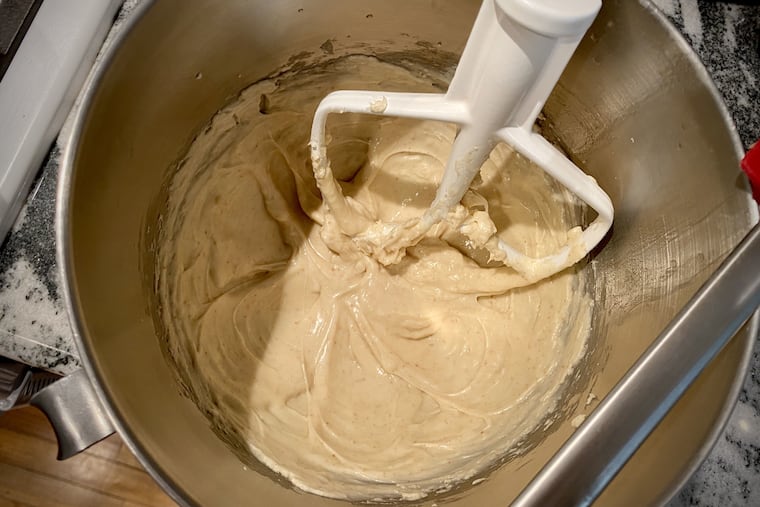
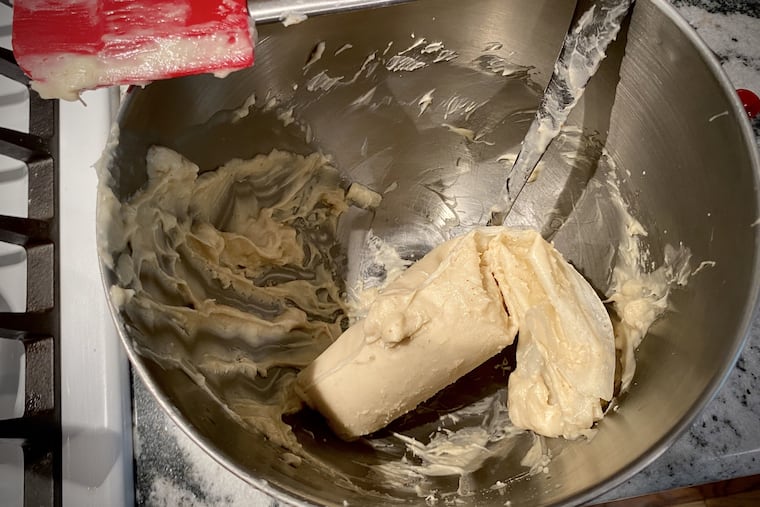
The Oreo cream filling is what set off my only real baking-induced conniption in this series of projects. It seemed fairly simple: After baking and cooling the wafers, simmer butter in a saucier (I used a tall-sided skillet) until most of the water has cooked off. Strain that into a stand mixer, add vanilla, salt, and the organic powdered sugar, and beat until creamy and soft. I flubbed the butter step a bit — browned-butter Oreo cream filling sounds better anyway! — but otherwise things went well. That is, until I tried to put the filling into a pastry bag and pipe it onto the wafers.
It is impossible to spoon what is essentially warm frosting into a plastic bag without another person to help you, but that is what I tried to do. And you can imagine my reaction when — after I somehow cajoled filling inside the piping bag that I miraculously found in our pantry, and after every surface I came in contact with was splattered with browned-butter cream filling and I had nearly lost my cool — the pastry bag split at the seams as I tried to pipe it onto a chocolate cookie.
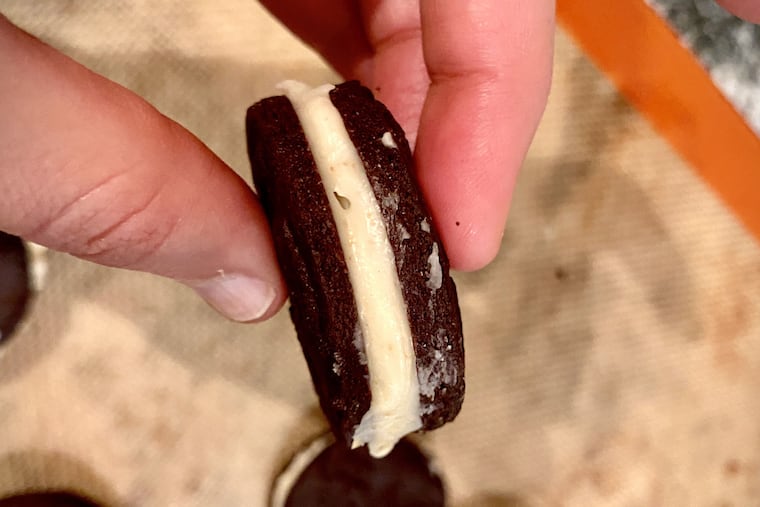
Needless to say, the filling was ultimately spread onto the wafers before sandwiching, which is what I should have done in the first place. Ironically, I prefer the cookies without the cream.

Project 3: No-yeast cinnamon rolls
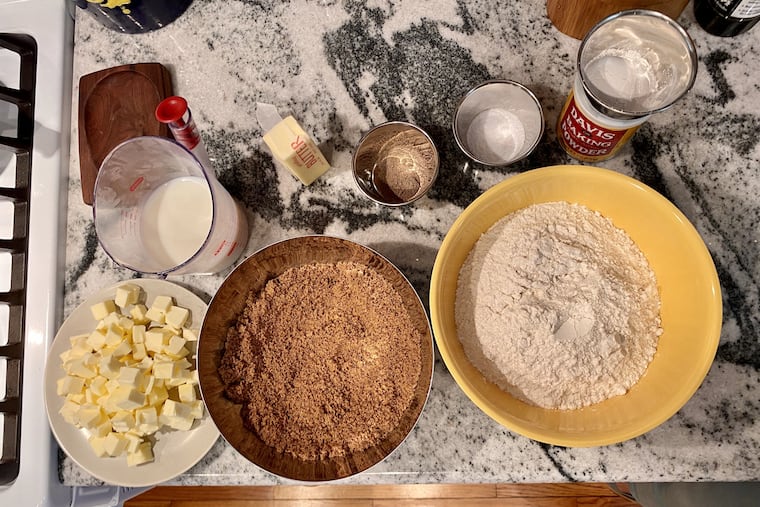
This idea came to me indirectly, by way of Porco’s / Small Oven Pastry Shop chef and owner Chad Durkin, who passed along his recipes for cinnamon buns and lemon pretzel bars (which I did make but poorly, I am sad to report). I have a deep-seated affection for cinnamon rolls, probably from making them as a kid, before I became too jaded for a tube of Pillsbury dough. Since Durkin’s recipe called for yeast, I found a yeast-less recipe from Claire Ptak’s Violet Bakery Cookbook (Ten Speed).
The ingredients were wonderfully uncomplicated, as was the necessary equipment. All I had to special-order was a 12-cup deep muffin tin. The steps were straightforward, too: Melt butter, keep it warm and liquid. Combine brown sugar and cinnamon till there are no lumps. Mix cubed butter and dry ingredients until a coarse meal forms, then add milk and mix till it becomes dough. Let it sit a bit, fold it, then let sit 10 minutes more.
It was all easy and entirely doable until I went to roll that quickbread dough out into a rectangle. Actually, all three of these recipes want you to roll the dough out into a rectangle or square. I asked my husband afterward, “How does one roll dough into a rectangle?” The very words seem at odds. Then he told me the tapered, French-style rolling pin we have is actually ideal for rolling out round shapes.

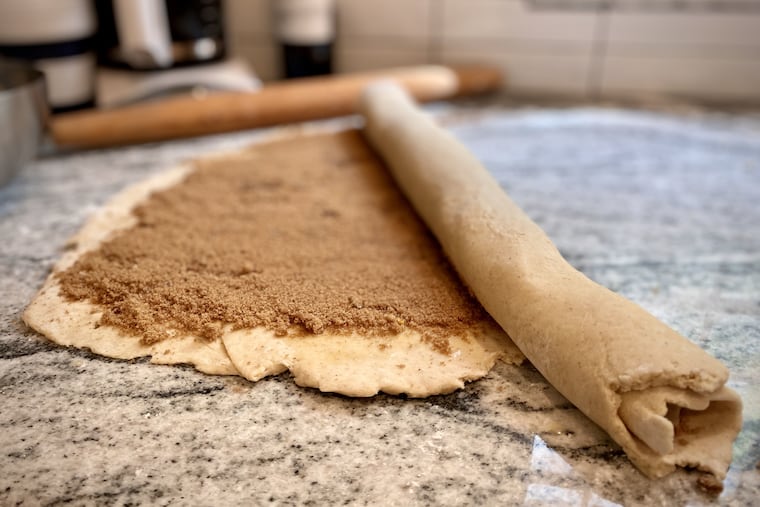
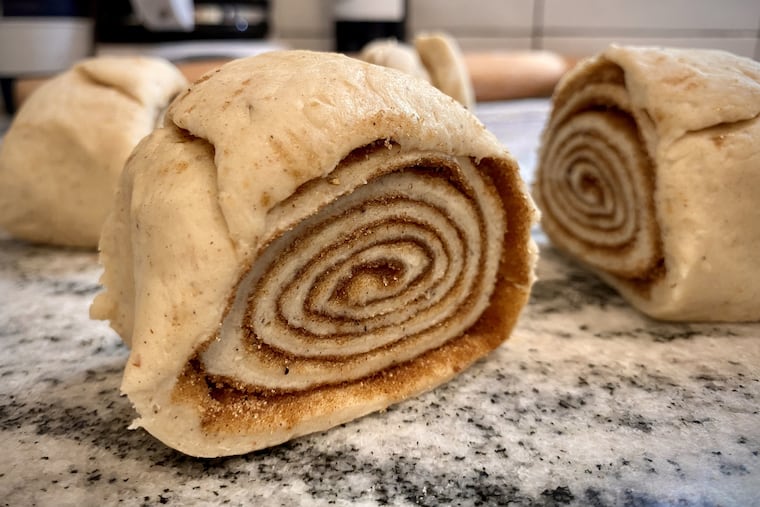
Anyway, I didn’t bother squaring off my dough’s decidedly round and jagged edges. I brushed it with melted butter, sprinkled on the cinnamon-sugar, rolled it up, and smooshed it into a cylinder. I did measure it twice before I cut it into 12 even pieces. However, I somehow botched the math and wound up with 11 cinnamon rolls, one of which is a blob of mostly sugarless dough.
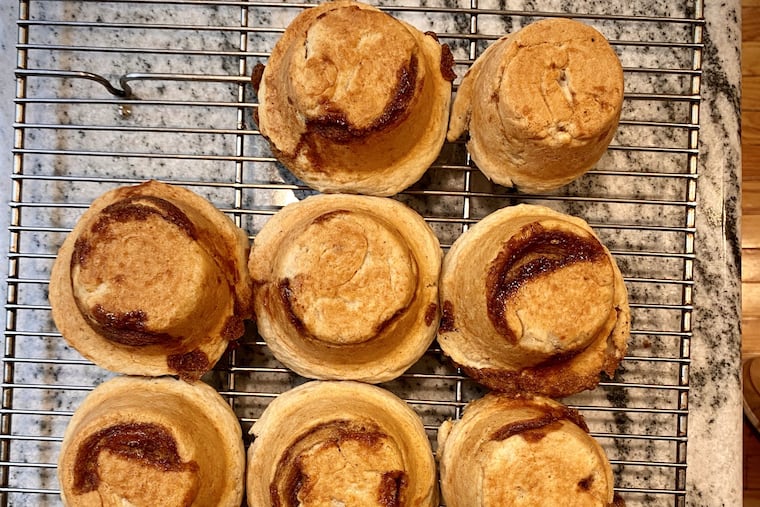
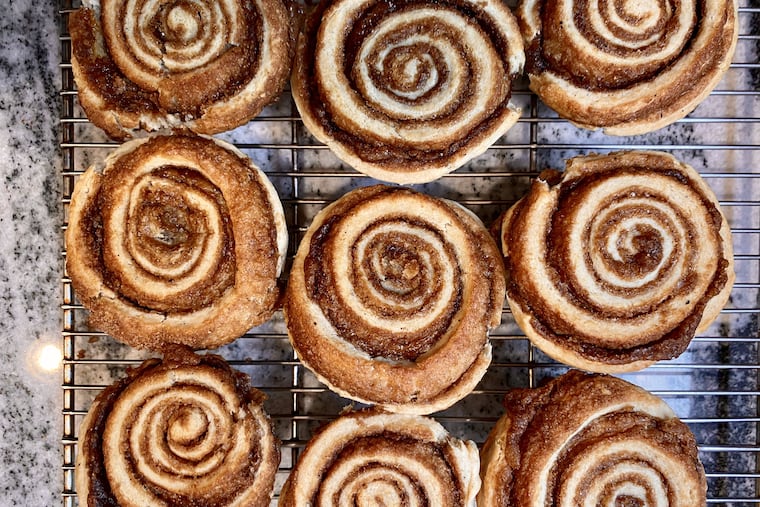
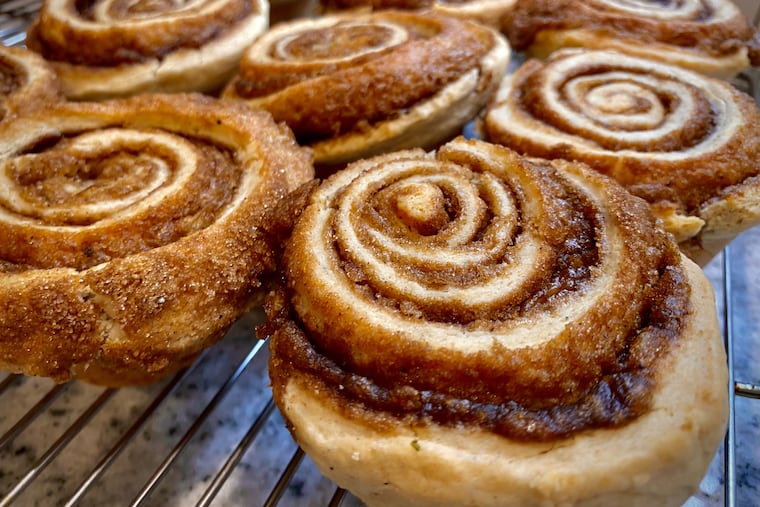
But when I look at these muffin-topped cinnamon buns and their imperfect swirls, I feel no frustration, just joy. And that’s what baking should be.
Lemon bars with meringue
Makes 8 bars.
For the crust:
10½ tablespoons unsalted butter, at room temperature
¼ cup plus 1 tablespoon white granulated sugar
½ teaspoon vanilla extract
1¾ cups all-purpose flour
For the filling:
1 cup fresh lemon juice
6 large eggs
6 large egg yolks
1¼ cups white sugar
9 tablespoons unsalted butter, cut into small chunks, at room temperature
For the meringue:
1¼ cups plus 2 tablespoons plus 1 teaspoon white sugar, divided
¼ cup plus 1 tablespoon water
3 large egg whites, at room temperature
Make the crust: Place the butter and sugar in a stand mixer fitted with a paddle attachment and mix on low until combined. Increase the speed to medium and beat for 3 minutes, until the mixture is light and creamy, scraping down the sides as necessary. Add the vanilla. Then add the flour about ¼ cup at a time, mixing until just incorporated. The dough should not form a mass, but it should hold together if you squeeze it with your hands.
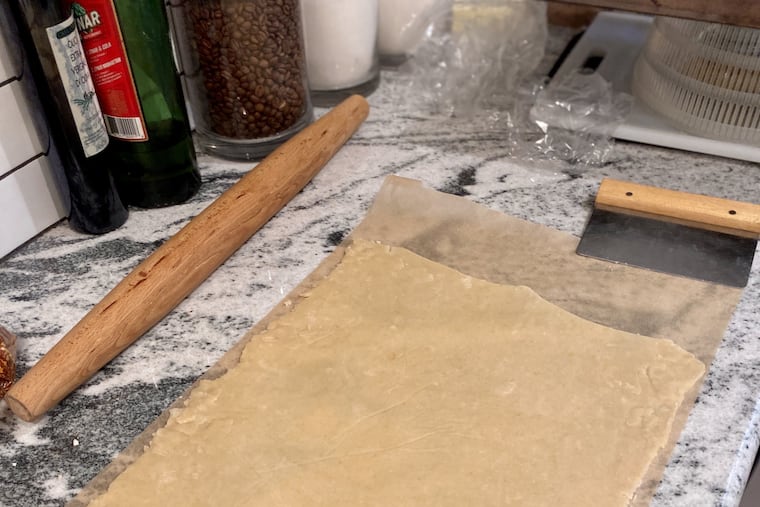
Transfer the dough to a large piece of parchment paper and pat it into a rectangle. Wrap in plastic and refrigerate for at least 30 minutes and up to 2 days. (Let it soften a bit before rolling.)
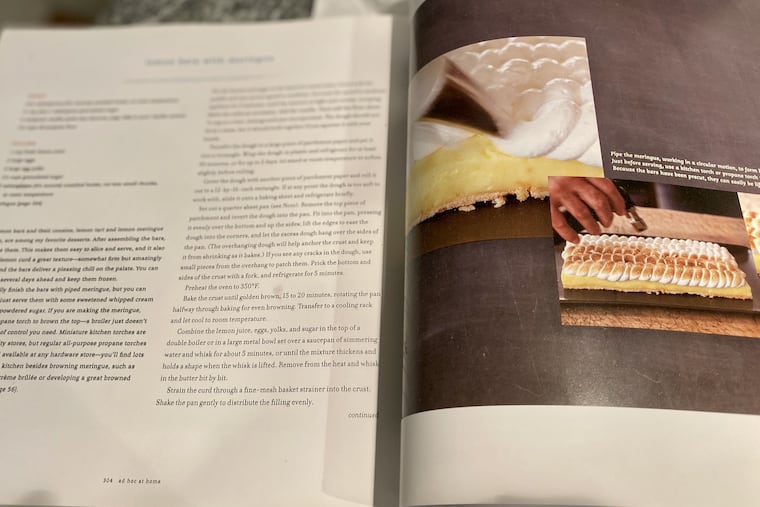
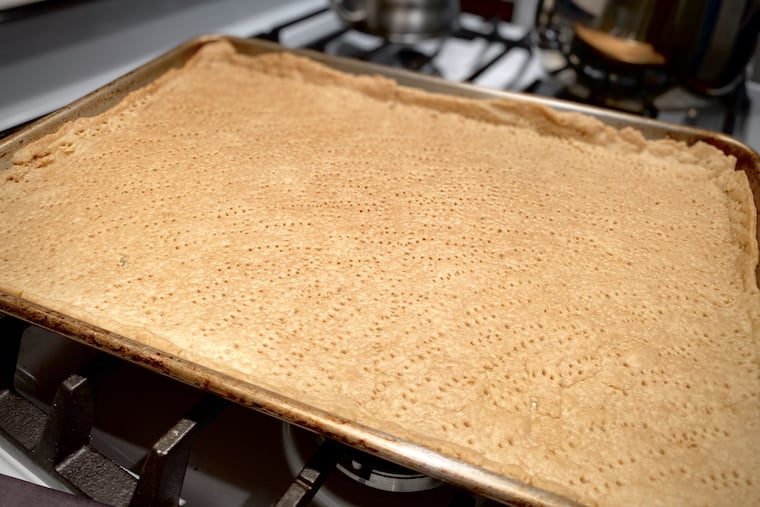
Cover the dough with another piece of parchment and roll it out into a 12-by-16-inch rectangle. Set out a quarter-sheet pan (9-by-13-by-1-inch). Remove the top piece of parchment and invert the dough into the pan. Fit into the pan, pressing it evenly over the bottom and up the sides, easing it into the corners. Let the excess dough hang over the sides of the pan to help anchor the crust. If you see any cracks, use small pieces from the overhang to patch them. Prick the bottom and sides of the crust with a fork, then refrigerate for 5 minutes.
Heat the oven to 350°F. When it’s hot, bake the crust until golden brown, 15 to 20 minutes, rotating the pan halfway through. Transfer to a cooling rack and let cool to room temperature.
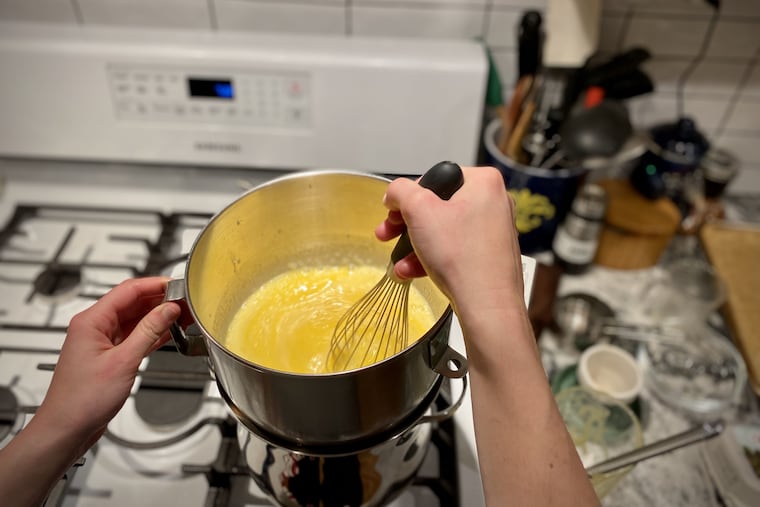
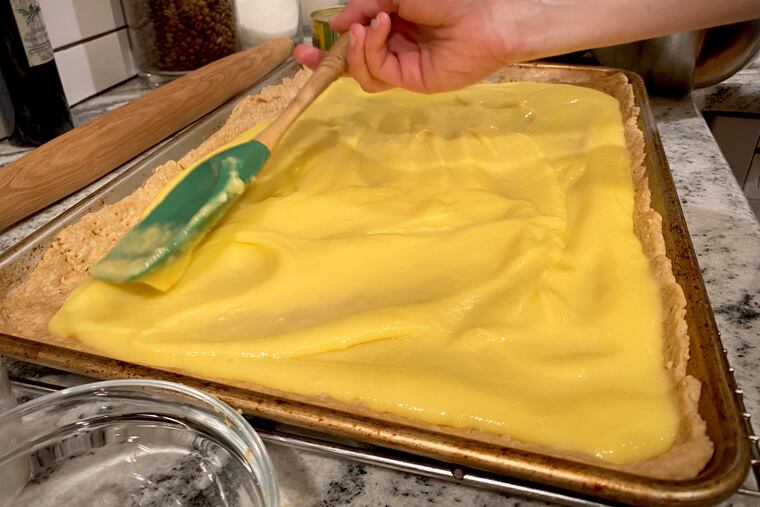
Make the filling: Combine the lemon juice, eggs, yolks, and sugar in the top of a double boiler or in a large metal bowl set over a saucepan of simmering water and whisk for about 5 minutes, or until the mixture thickens and holds a shape when the whisk is lifted. Remove from heat and whisk in the butter bit by bit.
Strain the curd through a fine-mesh basket strainer into the crust. Shake the pan gently to distribute the filling evenly.
Cut a piece of parchment paper the size of the pan, spray it with nonstick spray, and lay it over the lemon filling. Cover the pan with plastic wrap and freeze for at least several hours, until frozen solid.
Using a paring knife, scrape off any of the overhanging crust. Run a palette knife or narrow spatula between the pastry and the sides of the pan. With a wide spatula, lift the sheet of lemon bars and place on a cutting surface or a serving platter. The lemon bars can be returned to the freezer for up to 2 days on the platter.
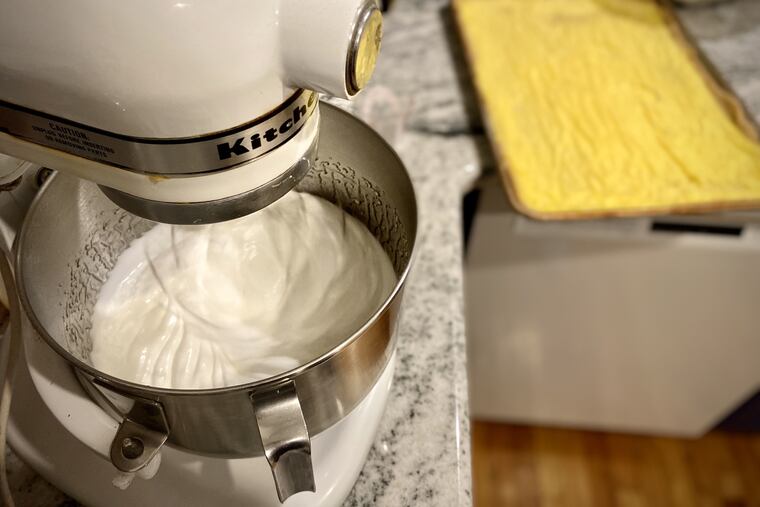
Just before serving, make the meringue: Combine 1¼ cups of the sugar and the water in a medium saucepan and heat over medium to 220°F, stirring to dissolve the sugar. Meanwhile, in a stand mixer fitted with a whisk attachment, whip the egg whites on medium until foamy, then gradually add the remaining 2 tablespoons plus 1 teaspoon sugar. Increase the speed to medium-high and whip until the whites form soft peaks. With the mixer running, slowly add the sugar syrup, pouring it down the side of the bowl to avoid the whisk. Continue to whip until stiff peaks form. Transfer to a piping bag (or snip off a corner of a plastic bag to pipe the meringue).
Beginning in the upper corner of the rectangle of bars, pipe a vertical coil of meringue, working in a circular motion, down the length of the bars. Turn the platter around and pipe a second coil touching the first. Continue until the bars are covered in meringue.
Using a blowtorch, carefully brown the meringue, adjusting the flame and/or moving torch closer or farther away to ensure even browning. Serve immediately.
— Reprinted from Thomas Keller’s Ad Hoc at Home (Artisan Books)
The recipe for Stella Parks' homemade Oreo cookies can be found in full on the Serious Eats website.
No-Yeast Cinnamon Buns
Makes 12 buns.

For the filling:
⅓ cup unsalted butter
1 cup plus 2 tablespoons light brown sugar
1 tablespoon ground cinnamon
For the cinnamon buns:
1½ cups all-purpose flour, plus more for rolling
2 tablespoons baking powder
2 teaspoons kosher salt
2 teaspoons ground cardamom
1 cup plus 1 tablespoon cold unsalted butter, cut into small cubes, plus more for greasing the pan
1¼ cups cold milk
White sugar, for dipping
Heat the oven to 390°F. Butter a 12-cup deep muffin pan.
Prepare the filling: Melt the butter and leave in a warm place so that it remains liquid. Mix together the light brown sugar and cinnamon until no lumps remain, then set aside.
Make the dough: In a stand mixer fitted with a paddle attachment, combine all the dry ingredients with the cubes of butter and mix until you have a coarse meal. Slowly pour in the cold milk while the mixer runs, until the dough forms a ball and comes away from the bowl.
Turn the dough out onto a lightly floured surface and leave to rest for a few minutes. Fold the dough gently over itself once or twice and pull it all together. Let the dough rest a second time, for 10 minutes.
Clear a large surface, dust lightly with more flour, and roll out the dough into a large rectangle about ⅛-inch thick. Brush the surface of the dough with the melted butter and, before the butter hardens, sprinkle on the cinnamon sugar. You want a good, thick layer.
Roll the dough up, starting at the long side, keeping it neat and tight. Gently tug the dough toward you to get a taut roll while rolling away from you into a spiral. Once it’s all rolled up, gently squeeze the roll to ensure it’s the same thickness throughout. Use a sharp knife to cut the roll crosswise into 12 even slices. Take a slice of the cinnamon roll, peel back about 2 inches of the loose end and fold it in back under the roll to loosely cover the bottom of the roll. Place in the muffin pan, flap side down. Repeat with remaining slices.
Bake the buns for 25 minutes. As soon as they’re out of the oven, flip them over onto a wire cooling rack so that they don’t stick to the tray. Dip each bun into a bowl of sugar and serve immediately.
— Reprinted from Claire Ptak’s Violet Bakery Cookbook (Ten Speed)
